Dramatic visual effects help set the stage for the WWII film Operation Mincemeat.
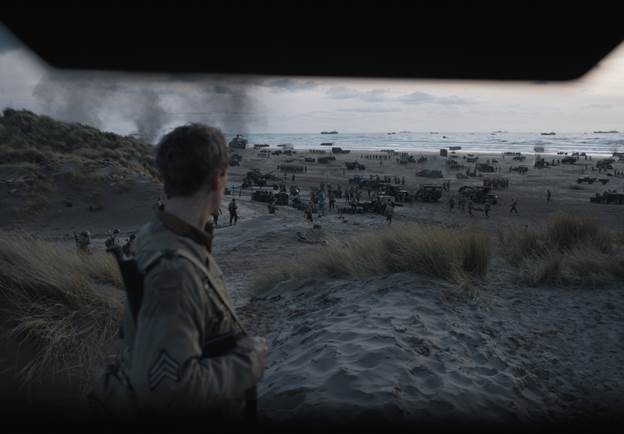
The year is 1943, and the realities of this Second World War, as was the First, are grim and horrific. To loosen Hitler’s grip on occupied Europe, the Allies plan an invasion of Sicily. But how can they pull off a large-scale assault under Hitler’s nose without being met with a large contingency of Axis troops? The answer: By planting fake documents with fake plans of a fake invasion at another location (in Greece), all in a move to deceive the Axis powers of their actual target (Italy).
The body of a deceased British vagrant was dressed as a Royal Marines officer with what appeared to be personal correspondence indicating that the Allies were planning to invade Greece and Sardinia but were making it appear in a ruse that Sicily was the target. In effect, this was a double ruse. The corpse was transported to Spain and released near shore, where it was found by a local fisherman who shared it with German military intelligence before returning the planted documents to the Allies.
The plan was outlandish. It sounded more like a Hollywood movie than an actual occurrence. It was both. The deception worked, as Germany focused its troops near Greece and Sardinia, leaving Sicily vulnerable.
This actual military operation plays out on screen in the film Operation Mincemeat, directed by John Madden. Adapted from the book by the same name by Ben Macintyre, the movie debuted on Netflix in May.
As improbable as the story line was, it was based on reality, and as such, the film had to be steeped in reality within an authentic period setting. That mission fell to Union, a London VFX facility, which also re-created key moments in the story. The work included building a fully CG submarine as well as creating matte paintings to depict war-town London stretching from Horse Guards Palace to Whitehall. A VFX breakdown of their work can be found here.
Rob Hopper, Union head of CG, says the artists created digital matte paintings of several main locations to remove non-era accurate features on some of the key set pieces. This was done primarily in Adobe’s Photoshop and Foundry’s Nuke, though Autodesk’s Maya was used for any 3D components. In some instances, bomb damage or scaffolding was added to some iconic locations to better match the conditions at the time. For the 3D, the artists used Maya and Maxon’s ZBrush (previously from Pixologic) to model the assets, and Adobe’s Substance to texture them. Rendering was done in SideFX’s Houdini with Mantra.
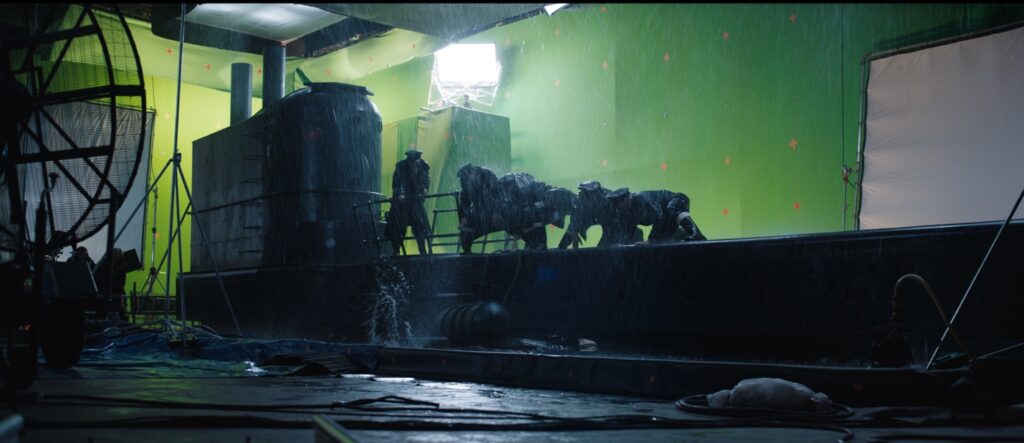
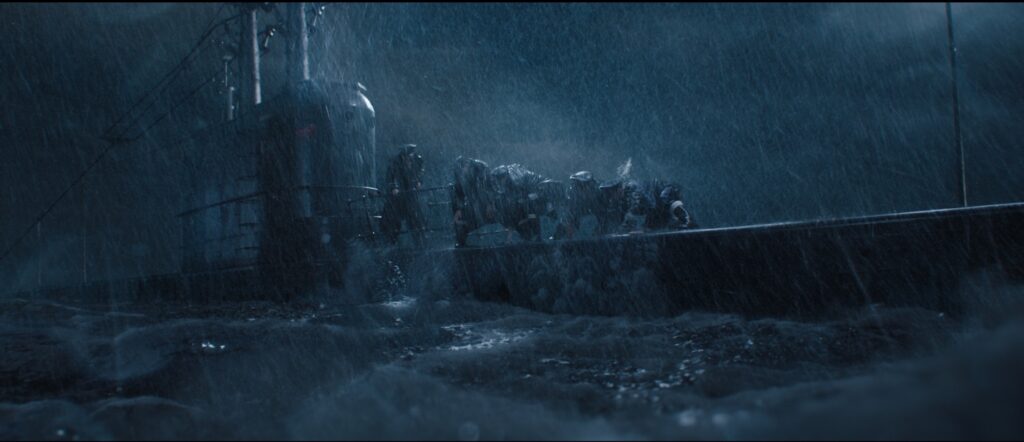
Audiences are drawn into the film with a compelling shot of a surfacing submarine during a blinding rainstorm as it unloads the body of the supposed British officer into the churning sea. “It is very cool and truly thrilling, establishing a narrative confidence that challenges the film to match it. The best thing is that you don’t even think about how we got the shots—they just did their job so well,” says Madden.
The HMS Seraph submarine scene was shot at Twickenham Studios on a partial set built against greenscreen; the submarine was added in post, along with complex water simulations. The same submarine was also used in a series of full-CG shots, from the opening scene with the vessel in stormy waters, to the re-emergence at Huelva Beach at night. The Seraph became a character in its own right.
For the USS Shubrick approaching Gela, the real HMS Cavalier was filmed at Chatham Dockyard and then partially replaced with the CG Shubrick and integrated into a computer-generated stormy ocean as it powered toward Sicily, requiring digital wake and ocean creation as well as a flotilla of ships. An additional number of shots were created showing the troops’ final arrival and the storming of the beaches with CG landing craft and destroyers in the oceans.
The artists used Houdini Ocean Spectrum and FLIP simulations for the water, and Houdini Whitewater and particles for the spray and mist layers. For the interaction with the VFX ocean and water simulations, the group built a custom Houdini Digital Asset (HAD) to handle the lookdev and asset updates. The Houdini renders were then composited in Nuke.
The wake areas immediately around the vessels were full fluid dynamic simulations that modeled the behaviors and splashes resulting from the interaction with the sea. Due to the size of the surrounding oceans—in a full-CG shot, this could cover several square kilometers—more optimized solutions were required. Depending on the distance to the camera, the artists could sometimes represent the foam and whitewater as particles or a texture, to optimize processing time and data demands, says Hopper.
The rainstorm, meanwhile, was crafted using a combination of 3D particle sims, rendered in Houdini, and 2D elements. The artists also simulated splashes for the rain’s interaction with the CG components of a shot, such as the submarines, ship, and ocean surface itself.
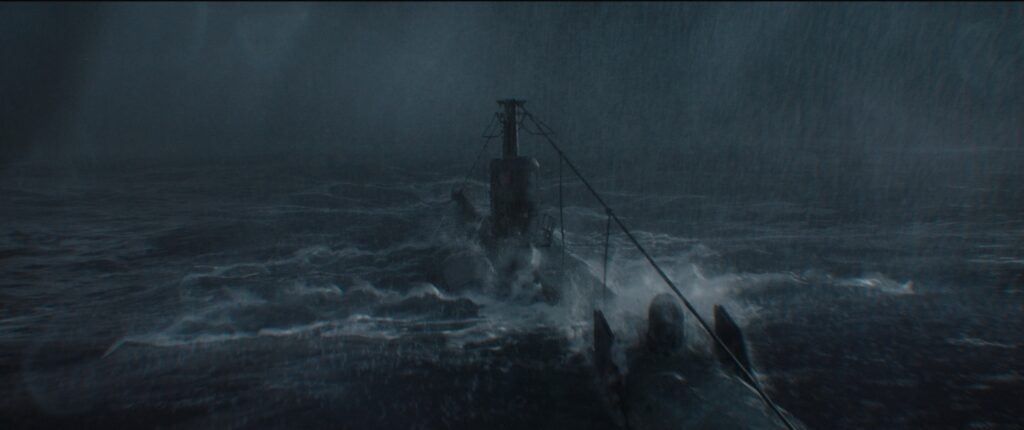
According to Hopper, Union typically renders its hard-surface assets in Autodesk’s Arnold but instead had to define a bespoke workflow to enable the group to render assets in Mantra while maintaining the same level of photorealism. He explains that it was important to use this other renderer for the project, as they needed occlusions, reflections, and refraction of the asset in their water simulations and ocean surfaces, which are part of the Houdini tool set.
Once the battle was complete, a final shot was created showing the aftermath on the following morning, a shot of 600-plus frames revealing the full scale of the battle that had commenced at the previous evening. The shot was achieved using a combination of CG crafts, vehicles, and props, along with plates containing soldiers marching on the beaches. All of this was presented with a view to historical references gathered to create an authentic feel.


